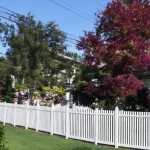
How Long Does Cedar Fence Last
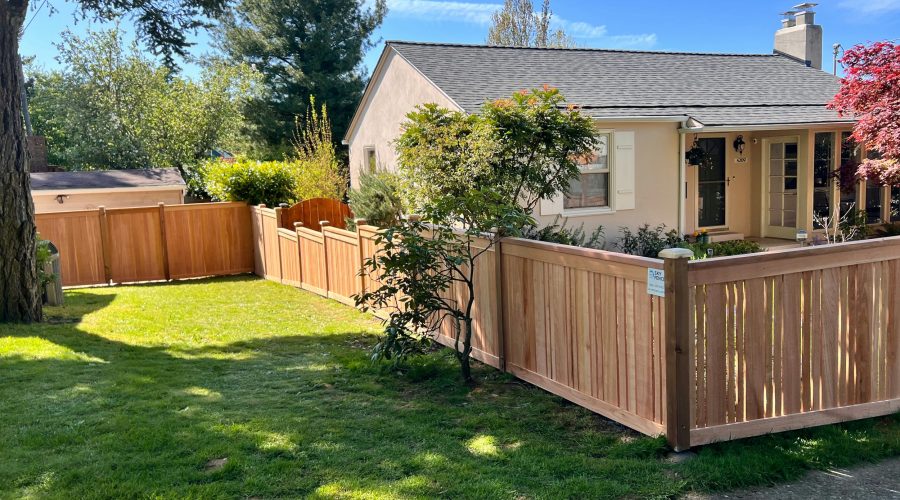
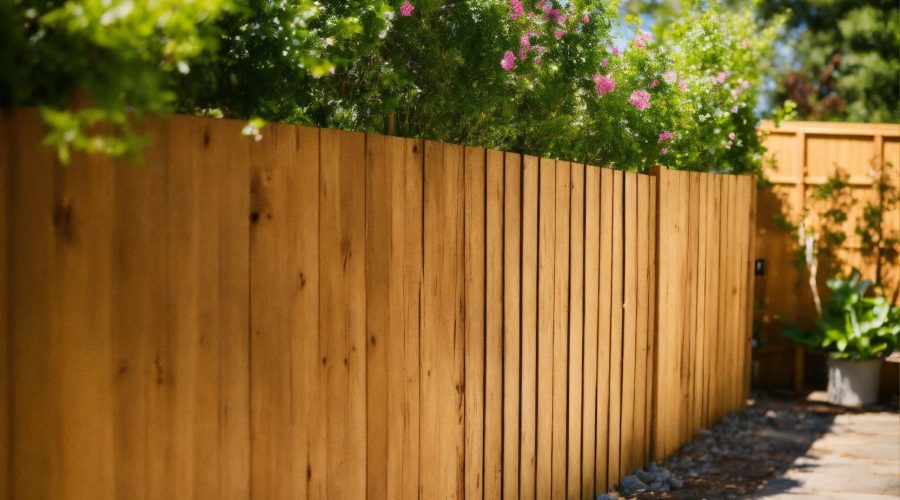
Cedar fencing is very popular with homeowners who want their homes fenced up with fences that would last long, look beautiful, and are environmentally friendly. The cedar fences have distinct colors, textures, and natural weather durability; they have been around for many decades and are still counted among the best quality products on the market for fencing. Perhaps you want a privacy fence for your yard, a touch of elegance for an area, or you are just looking for a means to not let pets and children out of the property ideal solution could be a cedar fence.
In this blog, we are going to talk about the life span of cedar fences, different factors that affect it, and maintenance to make it last for the years to come. A correctly kept cedar fence could beautify your property as well as add value to it.
What Are Cedar Fences?
Cedar fencing is basically fencing associated with cedar wood, which is a variety of conifer trees that occur throughout North America. Cedar wood is prized over much else throughout the world, thanks to its natural beauty and durability, as well as being not so easily attacked by rotting or warping and insect damage as other woods. Such features prove cedar to be the ideal wooden material for outdoor works like constructing fences.
Another feature of cedar is that it can be considered renewable. It also requires little chemical treatment, especially vis-a-vis other types of wood. Having the particularly green side of things is good for those homeowners who want to put a dent in their environmental footprint. Its oil keeps the outer elements at bay, making it truly usable in other environments.
How Long Do Cedar Fences Last?
Cedar is generally one of the best choices a homeowner could make, mostly due to its great durability. For instance, an average well-maintained cedar fence lasts between 15 and 30 years. Some determining factors are the climate, maintenance, and the quality of cedar wood. Then there are cases where treated cedar fences even go to lengths of having a lifespan of about 40 years with the right care.
Cedar has a very natural property that contributes to its durability. Cedar wood has natural oils that protect it from moisture, decay, and insects. That attribute that keeps the wood clear of the elements is by far the biggest advantage over other woods like pine or spruce which usually succumb to these issues. A cedar fence is therefore less likely to warp or develop rot compared to alternative woods, making them great for long-lasting constructions within the compound by homeowners.
Factors That Affect the Lifespan of Cedar Fences
Although cedar wood has quite a natural durability, it can surely be influenced by several factors on how long your cedar fence will last. Gaining an understanding of the factors will help you take action as required to retain your fence’s integrity over time.
1. Climate and Weather Conditions
The place where you live is a very important factor in the life of your cedar fence. The change in the weather can fully take a toll on the fence, leaving it mostly exposed to humid conditions, heat, and heavy rain. All these would lead the wood to expand and contract under pressure. With this, the natural movement would gradually wear out the fence. Temperature shifts command a little regular maintenance to keep the fence in tip-top condition.
2. Maintenance and Care
Though cedar is naturally resistant to several elements of the outside world still regular maintenance is essential to maximize its lifespan. This aspect, staining or sealing the entire structure, has to do with the maintenance of moisture and UV rays. Cedar properly maintained will remain beautiful and last for many decades while improper and neglected upkeep will shorten the life of the fence.
3. Protective Treatments
Although cedar is naturally resistant to the elements, applying a protective stain or sealant helps a great deal to prolong its life. This will give an added defense against moisture, sunlight, and insects. Thus, utilize high-grade stains or sealants designed specifically for outdoor wood to attain utmost efficacy.
4. Insect and Pest Damage
Cedar indeed resists insects like termites, but with time, wood can be affected by pest infestation if care is lax. Conducting regular inspections of your fence to check for insect infestation will help catch problems early. Once you see signs of pest activity, treatment as soon as possible can prevent further damage and maintain the strength of the fence.
How to Preserve Your Cedar Fence
To be beautiful and functional for many years, your cedar fencing must follow certain maintenance steps. Maintenance practices help protect the wood from weathering, retain its natural color, and make it structurally sound.
- Your cedar fence needs a fresh coat of stain or a sealant to save it from nature’s ruin every few years. Staining works well to maintain the rich reddish color, enhances the natural beauty of the wood, and keeps it sealed from moisture entering the inside. This is more critical in regions prone to high humidity and frequent downpours. Usually, a good range is between 5 to 7 years, depending on the kind of climate and sunlight exposure.
- Even routine cleaning and monitoring improves the lifespan of your cedar fence. With a gentle soap-and-water mixture, clean the fence to eliminate dust, debris, or mildew. This will do away with discoloration and the emergence of mold. Look at the fence for any of the signs, such as cracked boards, loose nails, or those that show rot, and take action to fix these to prevent further decline.
- The base of the fence is particularly vulnerable to moisture damage, so it’s important to protect it. You can mount a rot or mud board right below the fence posts to avoid damage due to moisture, animals, or lawn equipment. Even this can add years to the life of your cedar fence while saving it from undue wear.
Cedar Fencing vs. Other Wood Fencing Materials
Cedar may be durable and last many years, but how does it compare with other sorts of fencing wood? The primary advantage cedar holds over other woods such as spruce and pine is that it naturally resists moisture, rot, and insects. A pine fence will last typically about 15 years, whereas a properly looked-after cedar fence will easily last at least twice that long. Cedar has oils in it that give a better finish and require fewer chemical treatments, making it a much more environmentally friendly option.
Cedar Fencing—A Long-Term Investment
Cedar fencing is one of the best investments that homeowners can make today in beautiful, durable, and environmentally friendly fencing. Cedar is naturally resistant to rot insect damage and moisture, so it adds a long life to enclosed spaces and security and looks great in any home. Buy cedar regularly maintained, and your fence will endure the test of time-adding beauty and value to any property for years to come.
At fairfield fence company we are dedicated to cedar fence installation and maintenance, thus maximizing your investments. Our specialists will involve you in every aspect, from selecting the right kind of cedar to practical tips on keeping it in great condition for years. Contact us today and learn how we can help you create a lasting fence for decades!
How Do Surveyors Find Property Lines?
Surveying lands is extremely important in understanding property demarcation, which is vital for building, real estate transactions, and land management. Property owners must understand how surveyors identify a property line, as well as developers and anyone else involved in land usage. It would ensure divisions of properties and legal disputes over boundaries due to this process are avoided. But then how do surveyors accurately know where to draw these lines? This guide shall give important steps into the process and tools and technologies used for the same, and why it is so important to hire a professional surveyor for the task.
What Is Land Surveying?
Land surveying is a scientific approach by which the land is measured and mapped to define property boundaries and topographical features. It is a must in defining an accurate description of the land, thereby avoiding future conflicts with neighbors or with persons in the transaction of land. Surveyors quite importantly play roles in property development, legal disputes, zoning compliance, and others. By applying a combination of traditional and modern techniques, surveys have been completed so precisely that property lines are legally viewed as defining the ownership of land.
Understanding the Legal Description of Property
The foremost step in property demarcation involves the comprehension concerning the legal description of the land, which mainly is found in the property deed above all other documents among the others. This outlines how the property is defined in dimensions, bearings (angles), distances, and reference points for establishment during the property division. The legal description usually comes with words like “metes and bounds”, “lot and block”, or “rectangular surveys”, each representing different manners of identifying property boundaries.
Such legal papers are being closely studied by surveyors who want to establish critical information, e.g. direction of property lines, distance measurements, and natural features affecting the description. The document informs the field so that surveyors can understand what to look for during the field investigation process.
Field Investigation: Locating Existing Property Markers
Once the surveyor has read the legal description, they proceed to the next step: the field investigation. This is an attempt to locate physical markers on the land that match the legal description. These markers may include survey monuments, metal pins, or natural features such as streams, trees, or rock formations.
There are many instances where the boundaries of older property might be defined by monuments long since shifted or eroded. Surveyors will have to search for such historical monuments using the legal description as a guide. If no visible monuments can be detected, then the surveyor will need to place newly installed ones to accurately define the property lines.
Using Surveying Instruments: Measuring and Marking Boundaries
Surveying instruments are essential tools for accurately measuring property lines. Two of the most commonly used instruments are the theodolite and the total station.
• Theodolite: A theodolite is a mechanical and optical instrument that serves the purpose of measuring angles in either a horizontal or a vertical plane. During the survey, the theodolite is set out at reference points, so that an angle can be measured between two points on the property. These distances determine the exact course and line of the marks defining the property boundary.
• Total Station: A much more complex device, the total station offers both angles by the theodolite and electronic distance measurements. With this device, surveyors can measure distances and angles at a single sitting, minimizing the time associated with work and improving efficiency. A total station allows one to input data directly, minimizing possible slips and ensuring accurate recording of measurements.
GPS Technology in Property Line Surveying
In these last few years, land surveying has undergone tremendous revolution by the GPS or Global Positioning System technology. The surveyors can capture data with remarkable precision even up to centimeter level using great signals from the network of satellites orbiting around the Earth that can now give the surveyors an opportunity to locate their property corners with real-time boundary lines accurately.
GPS surveying systems use signals from satellites to receivers on the Earth. Surveyors collect the signal travel times between satellites and GPS receivers to determine exact coordinates at points on the property. Mainly, this technology is very useful when conducting large surveys or property boundary surveys. Most importantly, it speeds up the process of determining the property boundaries.
Calculating Coordinates and Determining Property Corners
As soon as the surveyor collects data from the area, he calculates the specific coordinates of the property corners as per the measurement and legal description. The surveyor enters the information collected into specialized software to generate a digital map that shows land boundaries correctly. The program will process all data and create a digital representation of the land with the boundaries of the property indicated.
In some cases, the surveyor may have to make adjustments to the discrepancies between the legal description and the actual physical features of the land. This situation generally occurs in an older property or where the markers have been compromised or lost over time.
Marking the Property Boundaries
Surveying is the last step in the surveying process, which requires physically marking the boundaries on the ground. Surveyors normally lay fresh survey monuments at the corners of the property boundaries, usually durable monuments made of concrete or metal. These are placed as signs to show where the property lines are. Surveyors may also during this time place other stakes, flags, or markers to indicate what is considered a boundary along the property lines.
Such markers will eventually prove to be important during future property disputes or when the property undergoes sale and/or development. Property owners and their subsequent surveyors will view these markers to verify whether or not they are within the boundaries.
The Importance of Professional Surveying
Accuracy has a very important role to play in land surveying as even a microscopic error can lead to unnecessary disputes, legal differences as well as problems concerning construction. A boundary survey should always be performed by a professional surveyor who is licensed so that he or she can ensure precision as much as possible using the equipment and consultancy requirements of the profession.
Surveying seems quite simple but in reality involves complicated and many facets such as shifts in the terrain, varying legal descriptions, and overlapping boundaries. An accredited surveyor is trained and qualified to effectively approach all of those issues while producing trustworthy, highly accurate surveys.
Potential Discrepancies and Legal Implications
In some cases, there may be discrepancies between the physical features of the land and the legal description of the property. For example, a natural feature like a river or tree line may have changed over time, making it difficult to match the boundaries to the current landscape. In these instances, further investigation and analysis are required to resolve the conflict and determine the correct property lines.
There could be some physical features of the land that do not match the legal description of the property. For example, if there is a river or a tree line as a natural feature, over time these may change and therefore it will be challenging to match boundaries with the present landscape. In such cases, more investigation and analysis are necessary to solve the conflict and determine the correct property lines.
How We Can Help
At fairfield fence company, we understand the importance of property lines for either residential or commercial property. Whether you need a new fencing project, a boundary settled, or are preparing to sell or buy land, we offer professional surveying services and valuable tools to bring you through the tangled complexities surrounding property boundaries. Our experienced team uses the latest technology, including GPS, total stations, and traditional surveying methods, to provide precise measurements and ensure your property boundaries are clearly defined.
We work closely with property owners, developers, and legal professionals to deliver reliable surveys that support your goals. For further inquiries about finding property lines or other questions relating to our services, please call [Your Commercial Fencing Company] to get them served professionally. We will assist in mapping the right boundaries that are to characterize your property lines so you may have complete peace of mind for some good time.
What Type Of Fence Adds To Property Value
In today’s real estate market, first impressions are important and one of the most potent ways to have your property stand out would be a great quality fence. Whether one intends to gain privacy, increase curb appeal, or ensure security, a fence does all this and more. With the vast array of materials, designs, and customization options available, choosing the right fence is no longer just about enclosing your property but adding significant value to your home. From wooden fences that evoke classic charm to sleek aluminum designs that offer durability and elegance, the choices can be overwhelming. The good news? There’s a fence style for every taste, budget, and need.
In this blog, we are going to discuss what type of fence adds to property value and why each option has its appeal. Knowing the materials, the design elements, as well as local market preferences will help you make an educated finale that will add to both the aesthetic and functional scope of your home. Hence, let’s dive into how fence installation can transform your property into something special.
Materials That Add Value to Your Property
Material is one of the important determinants in increasing property value when installing fences. The different fencing options are brought by different kinds of unique benefits associated with each material; therefore, the characteristics of each material should be of great interest to anyone before making a choice.
1. Wood Fencing: Classic Appeal with a Timeless Aesthetic
Wood is the most conventional material for a fence that can be used for adding value to one’s home. It goes perfectly well with every aspect of its tiny cottage or huge estate and looks very beautiful and classic with the structure. Its rich textures and warm tones can add real appeal to your house.
While wood undeniably offers beauty, it does truly need consistent maintenance to hinder rotting and warping, as well as insect damage. But, if well-maintained, a wooden fence can add tens of thousands of dollars in value to a property, especially when blended with landscaping features that further complement its natural beauty. This is especially true for wooden privacy fences, which many buyers deem a necessity in the style-security equation.
2. Wrought Iron Fencing: Elegant and High-End
Wrought iron fences, or iron fences, simply elaborate all the features of elegance and sophistication. An exceptionally decorative design adds a sense of magnificence to any property, making it a good choice for homeowners who prefer an extravagant look. This type of fence can last long and withstand different weather conditions, so this will be a long-term investment in property value enhancement.
It is rather true that wrought iron fences look just perfect for homes with a traditional or Mediterranean design. But refined looks can go with many different styles of homes. Though these would require some maintenance quite often to avoid rusting, being a classic design, the durability and long-lastingness of their appeal make them a good investment for property value.
3. Vinyl Fencing: Low Maintenance and Versatile
Vinyl fencing can be one of the best choices for homeowners who need a fence that requires less maintenance, does not rust, and is beautiful to look at. Being synthetic in composition, vinyl fences are extremely weather, fade, and pest-resistant, making them a wise investment over the long haul.
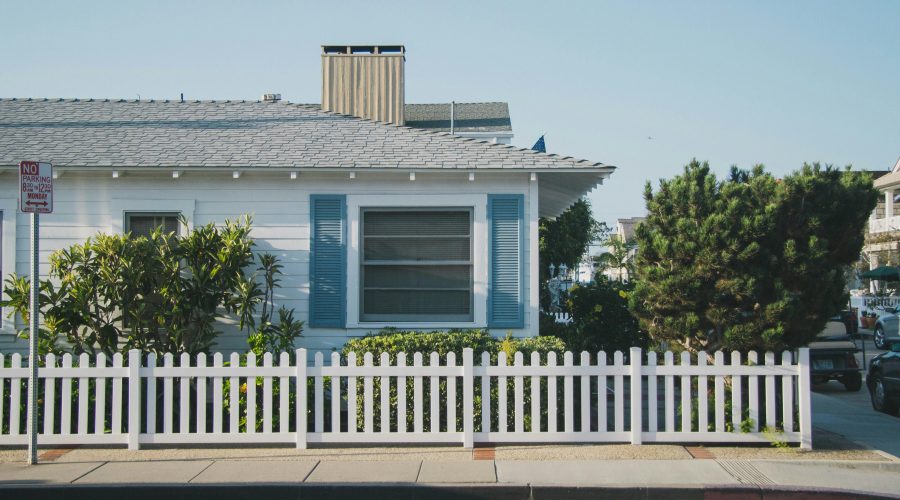
Vinyl fences come in various styles ranging from classical picket fences to privacy panels and thus can be installed in the spirit of the house. Be it a coastal area, inundated with moisture, or a hot place, it will give good competition to elements and year after year keep up the price value of the property. Generally, it doesn’t encourage maintenance. Washing occasionally with soap and water completes the job. This is what makes vinyl appealing to buyers looking for hassle-free solutions.
4. Aluminum Fencing: Strength Meets Style
Aluminum fencing adds the sweet touch of wrought iron besides caring for vinyl. This makes it as great as being known for strength, durability, and low seeping like aluminum fences that would make it suitable for properties looking into securing themselves and enhancing beauty overall. Adding elegance to the property.
Aluminum fencing also does not rust or corrode. This makes it useful in cases of wet or humid situations. The material is highly customizable and can be easily matched to various designs or finishes to help ensure that your home is in line with its architectural style. Aluminum fences are purely high-end looking but do not come with the expensive price tag that wrought iron has. Thus, making it a worthy investment if installed properly.
Design Considerations: Functionality Meets Aesthetics
The selection of materials is important but in addition, the design of the fence can increase or decrease the value of your property. Your chosen fence style should complement your home’s exterior and meet your specific needs-fencing for privacy, security, or aesthetics.
1. Privacy Fences: Seclusion and Security
A privacy fence is a common choice for homeowners to have seclusion and security. Privacy fences obstruct the view from outside and thus fulfill the requirement of privacy; it appears like a sanctuary. The common materials for this kind of fence are wood, vinyl, or composite materials. This depends on the kind of privacy one is looking for based on the height and design of the fence.
Privacy fences are an essential requirement for those who need a bit of space with small children or pets that need a secure environment a lot of peace of mind when talking about buyers looking at your home because of all that close-knit community living an area can offer.
2. Ornamental Fences: Enhancing Curb Appeal
Ornamental fences are a lovely way for homeowners to increase the value and appearance of their property. The ornamental fence is a great blend of functionality and render, making it a key feature ornament of front yards, gardens, and other areas where such features are most important.
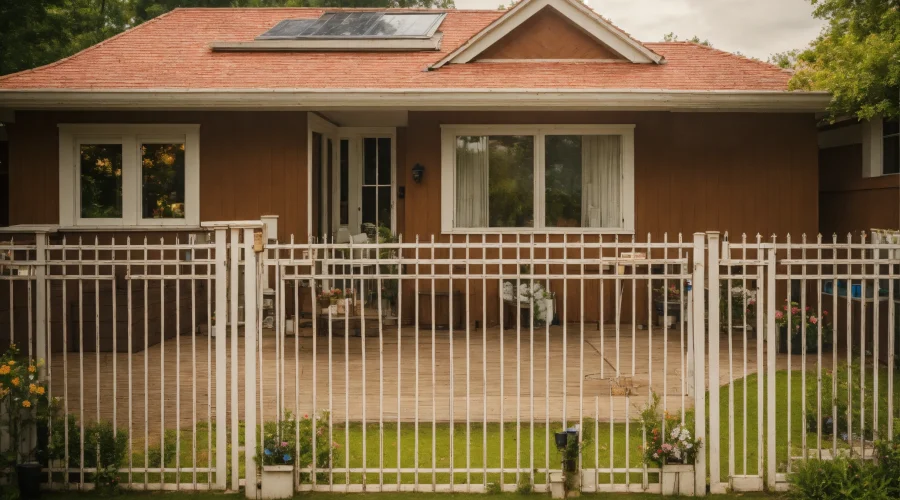
Ornamental fences are more of traditional materials such as wrought iron or aluminum and are defined by very decorative designs. Depending on their artistic elements, these fences have the potential to enhance your home’s overall aesthetic and curb appeal significantly. This increases the possibility of attracting buyers and adds value to your home.
3. Custom Designs: Tailored to Your Home’s Style
Custom-designed fences are perfect for those who have a specific vision for their fencing or want a unique design. Whether your home is contemporary or rustic, or even matches traditional design elements, a custom-built fence can easily incorporate that into its construction. A person can create a highly flexible fence that conforms with the entire landscaping and aesthetic surroundings of an individual.
A professional fence installation company realizes your custom design that not only reflects your personality but also adds value to your property. An aesthetically designed, unique fence forms an attraction for your potential buyers, especially those who are keen on detail.
Closing Thoughts: Let Us Help You Choose the Best Fence for Your Home
Choosing the right fence for your property involves a balance between its complement to aesthetics and functionality as well as long-term value. For the classic beauty of wood fences, the durability of vinyl, or even the elegance of wrought iron, there’s no doubt that there will be a fence that will suit your home beautifully and enhance its appealing value.
At fairfield fence company, we specialize in helping homeowners choose and install the perfect fence for their homes. Relying on our years of experience in this field and the wide range of available fencing options, we can help guide the selection process with confidence in opting for a fence that, in addition to being beautiful, adds value to the home. Get in touch with us now to find out how we can beautify your property effectively with a stunning and quality fence that will add both beauty and utility.
What Is the Cheapest Fence to Have Installed?
Cost is always one of the most significant frets about property enhancement such as fencing among homeowners. There is, however, quite an extensive array in their pricing-from very economical rates to exorbitantly expensive ones based on the types of materials used, the extent of the area requiring fencing, and the installation procedures adopted. But at the end of the day, if one is interested in getting a budget option, the wise question is what would be the cheapest fence to have installed?
In this article, we will discuss all the economical fencing types, which will draw you into the benefits of installation and the long-term costs of maintenance. At the end of this article, you will get comprehensive information regarding the cheapest fence installations, along with real-life tips to make the most out of your fencing dollars.
Chain Link Fences: The Most Affordable Option
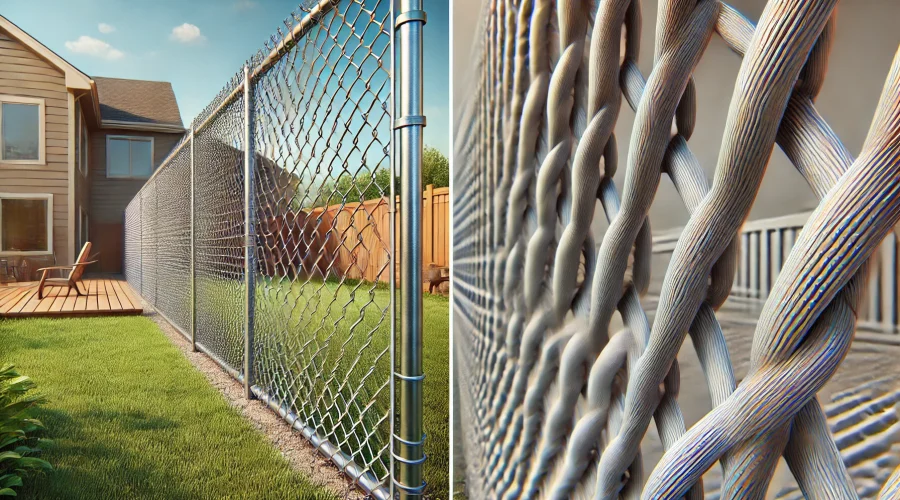
Chain link fences are the cheapest fencing options in the market today. Chain link fences have proven an increasing demand due to price affordability and practical application. Chain link fences consist of wires made of galvanized steel or coated wires woven in the form of a diamond shape. Here is why these chain link fences are the best of the cheapest to install:
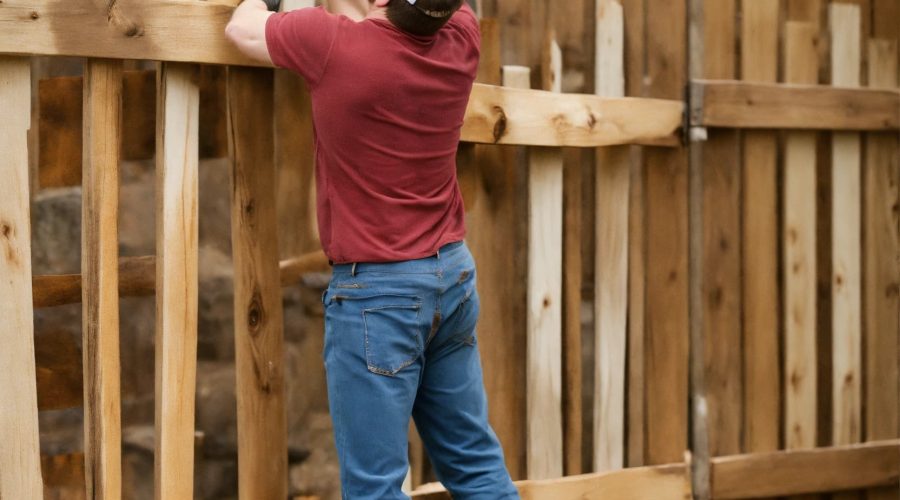
- The materials needed for a link fence are very cheap, and so is the installation. That is why chain link fences are one of the cheapest options to consider. Furthermore, the cost of installation is also lower as there is minimal requirement for labor, especially for DIY projects.
- However, chain link fences are also very cheap, affordable, and long-lasting at the same time. They consist of galvanized steel which is resistant to rust and corrosion; thus, it can be used well outdoors. Chain link fences are suitable for high-wind areas as they are aptly built to withstand weather conditions.
- Chain link fences are generally easy to establish as their components are easily put together. The first is to set up the post first, and then the wire attached to the posts. This simple method results in savings in as much labor cost as materials used.
- The chain link fences are secure and are effective boundaries; however, they have an open design. This allows visibility in and although airflow is not translated into much privacy. This can be a bit disadvantageous for people who are trying to keep yards private from neighbors or passersby.
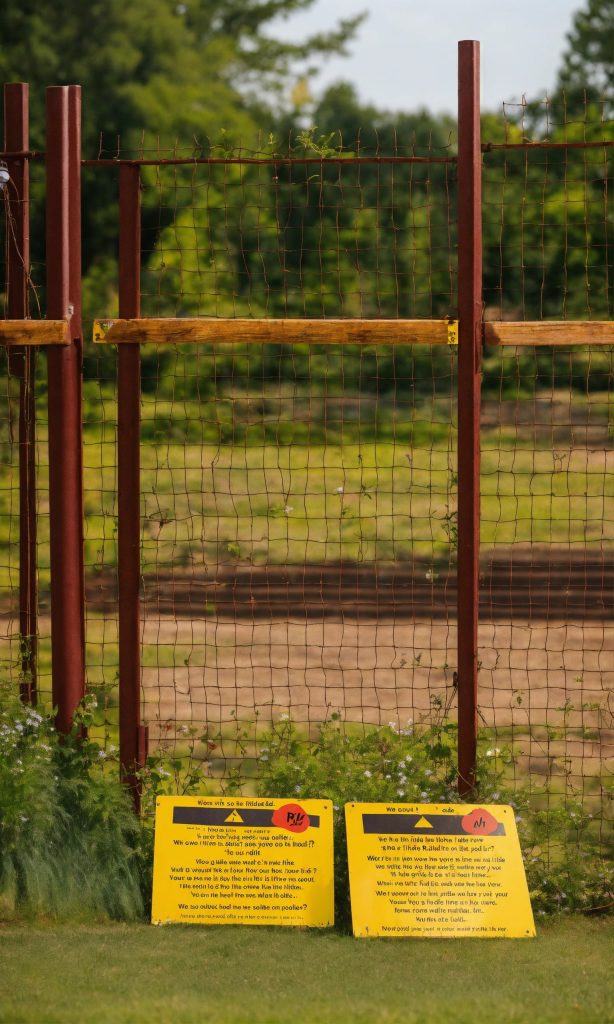
Overall, chain link fences are a fantastic option for homeowners on a budget who want a simple, functional fence with minimal upkeep.
Wood Fences: A Popular Yet Costly Maintenance Option
Wood fences are one of the most common types of fences, offering both functionality and aesthetic appeal. While they can be affordable to install initially, it’s important to consider the long-term costs and maintenance required to keep them looking their best.
- Affordable Initial Installation: Wooden fences remain quite affordable when it comes to installation costs. Generally, every type of wood has its own price to pay, with pressure-treated pine wood being the cheapest usually. Furthermore, the wood fences can equally be personalized in terms of different designs, heights, and colors; hence, a lot can be opted for among those.
- Maintenance Considerations: Wood fences have their prominent drawback as well, which is the continuous maintenance requirement. Wood will decay, bend, or be attacked by termites – especially in humid climates. Thus, for it to remain aesthetically pleasing and long-lasting, it requires periodic staining or painting. This, therefore, adds to maintenance costs and labor hours on the long list of investments made for a wood fence.
- Aesthetic Appeal: Wood fences are, perhaps, the most flexible of all fencing types; generally, they invite a lot of interest from homeowners. One can do all sorts of painting and staining to a wooden fence with colors that match the style one would like for the home. However, just as indicated earlier, these types of fencing will need some maintenance to keep their beauty and prevent damage over time.
Wood fences might be a great choice for homeowners looking for an aesthetic, natural fence, but they do come with additional maintenance costs that should be considered when planning your budget.
Vinyl Fences: Affordable and Low-Maintenance
Vinyl fences, often referred to as PVC fences, offer a modern and low-maintenance alternative to traditional wood fences. While vinyl can be slightly more expensive initially, its long-term benefits make it a cost-effective choice in the long run.
- Durability and Low Maintenance: Vinyl fences are highly durable and resistant to weathering, rot, and pests. Unlike wood, vinyl doesn’t require regular painting or staining. This significantly reduces maintenance costs and effort. With proper installation, vinyl fences can last for many years without deteriorating.
- Cost of Materials: Although initial costs may be higher than wood or chain link, vinyl fencing is still an inexpensive alternative compared to much more expensive materials like wrought iron or aluminum. The maintenance-free and long life of vinyl fencing makes it a wonderful investment over time and saves on expenditure for repairs and maintenance.
- Options of Styles: Vinyl fences come in many styles, including privacy, semi-privacy, and picket fences. This adds variety for homeowners, who may want to customize their fences to match the aesthetic values of their property. The colors should be considered in this regard, as vinyl fences are also available in multiple shades.
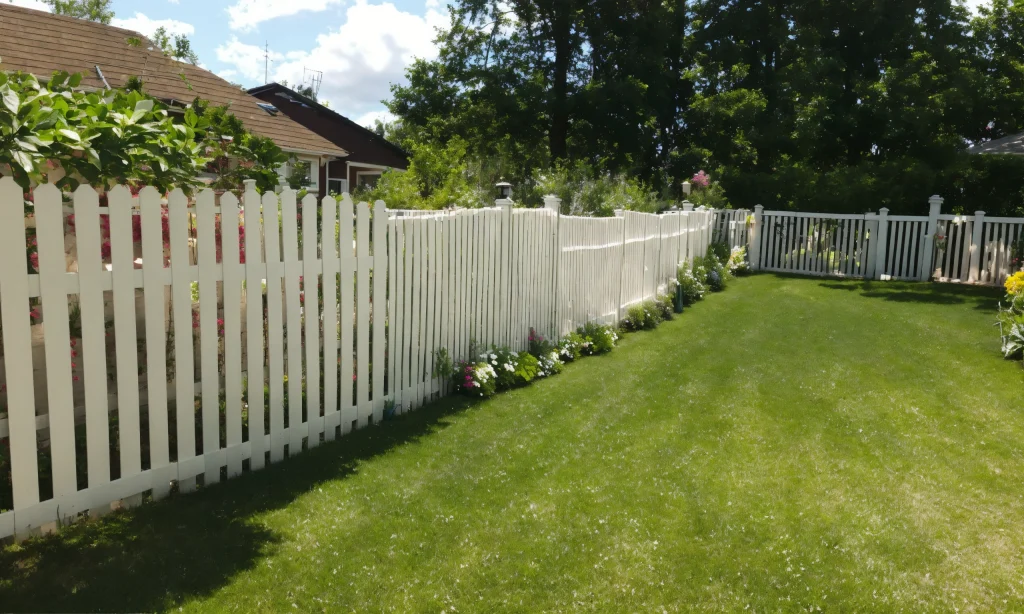
In terms of installation, vinyl fences are relatively easy to put up, with parts that interlock and require minimal tools. This makes DIY installation a feasible option for many homeowners, further reducing costs.
Aluminum Fences: Durable and Attractive, But More Expensive
Aluminum has become one of the most sought-after fencing materials by homeowners who want an attractive fencing type that is durable and still affordable; although, of course, it is a bit pricey than chain link or vinyl ones. Aluminum fencing is generally pricey but quite worthwhile because of its benefits.
- Strength and Durability: Aluminum fences are strong and resistant to rust and corrosion, making them ideal for long-term use. They can withstand harsh weather conditions and do not require much maintenance. This makes aluminum fencing a good choice for homeowners who want a low-maintenance yet durable option.
- Aesthetic Appeal: Aluminum fences are often chosen for their aesthetic appeal, as they can be designed in various styles, including ornamental patterns. These fences can add a touch of elegance to your property, enhancing its curb appeal.
- Lower Maintenance Costs: Unlike wood fences, aluminum fences do not require regular painting or staining. They are also resistant to the rust that can affect other metals. This makes aluminum a cost-effective option over time, especially when you consider the lack of maintenance required.
However, the initial cost of aluminum fences is generally higher than that of chain link or vinyl, which may not be suitable for those on a strict budget.
Other Considerations: Installation and Long-Term Costs
The cost of materials is just one of the factors that determine the price of a fence. Installation costs also depend on the surface area to be fenced, the kind of terrain to be fenced on, and any extra features like gates or decorative elements. Doing the job yourself can save quite a bit. Only in the case of complex installations would you need to have the assistance of a professional installer.
Moreover, one must consider long-term expenditures for the upkeep of fences. Some materials like wood will cost less upfront but are very expensive when it comes to maintenance in the long term. In contrast, materials like vinyl or aluminum may have more expensive upfront costs, but they usually do not require any maintenance and make them cheaper in the long run.

When it refers to searching for the cheapest fencing to be installed, a chain link fence usually serves as the most affordable, followed respectively by vinyl and wood. Generally, while wood fences add style, they bring in a long run of higher maintenance costs. For low-attention activities on the user’s part, both the durable style and strength of aluminum fences complement—but tend to cost a little high. Vinyl fences offer a wide range of solutions when it comes to durability and low maintenance.
fairfield fence company can build for you a fence that meets your budget and requirements. We have chain link fence to affordable designs, including vinyl options; we’re certain to have everything in between so that you can make a decision based on what is right for your property. Let us save you from spending too much to achieve security and beauty!
How Long Does Fence Stain Need to Dry Before Rain?
Staining your fence is a bit like dressing it up for a long, durable life. It not only makes your fence look sharp and well-maintained but also acts as armor, protecting the wood from rain, sun, and pesky mold. However, timing is everything. As you may have suspected, the instant your freshly stained fence gets a downpour just after application, it could prove to give a flat mild disaster or perhaps a full-blown catastrophe. Let’s take a closer look at how long fence stain needs to be dry before rain crashes the party, and how to outsmart Mother Nature.
Remember how you have spent hours staining your fence, brushing every inch to absolute perfection? Then the rains, and what did it do? The stain instantly becomes a streak of disappointment as nature takes away all your effort. Fence stain requires a good amount of time to dry and bond with the wood to offer protection and a smooth finish. Too soon rain can thin the stain or leave it looking blotchy, or peeling off like a nasty sunburn.
The Golden Rule: 12 to 48 Hours for Drying
Generally, fence stains can survive light rain after a drying time of at least 12 hours. However, for complete protection and curing, most manufacturers recommend between 24 hours and 48 hours before introducing rain onto the stain. The specific time depends on various factors, including the type of stain, the nature of the wood, and the climatic conditions
Factors That Affect Drying Time
1. Type of Stain: Oil-Based vs. Water-Based
- Stains Oil-Based: These stains are very hard and long-lasting, but they dry slowly. Expect them to take closer to the 24-48 hour mark.
- Water-based Stains: Faster-drying is normal, but their duration is only 12-24 hours, so it’s better to use them when you have a waiting rain race.
2. Weather Conditions
- Temperature: Try and get a comfortable day where the temperature is neither lower than 50°F nor higher than 90°F. This would make the stain dry inefficiently and unevenly.
- Humidity: With very high humidity, drying takes longer. If that air feels like a sauna, be ready to leave that stain longer than usual.
- Wind: GA gentle breeze would hasten the drying process but don’t rely on it to do magic like the hurricane winds.
3. Type of Wood
Softwoods such as pine or pressure-treated lumber easily soak up stains very quickly but may take longer to cure. Hardwoods generally dry fairly quickly; for example, cedar or redwood may dry quickly, but they need careful touch monitoring to prevent blotchy finishes.
How to Test if Your Fence Stain is Dry
Not sure if your fence is ready to face the rain? Try these simple tests:
- The Touch Test: very lightly touch the stained surface. If it feels sticky or leaves residue on your finger, it is not ready.
- The Water Drop Test: Program a few drops of water on the perch stain. If the water beads up, the stain is dry enough to resist rain. If it absorbs, wait longer.
Bribing Mother Nature
Make sure you keep a tarp on hand, because sometimes just as you finish staining the last bit of your stained fence, it seems that rain clouds are waiting for you. But remember, trying to cover your fence mid-storm is like trying to save an ice cream cone from melting in sweltering 100°F heat: it’s messy, stressful, and rarely comes out well. You should plan; check the weather forecast religiously or consider giving the weather gods a nice cup of coffee (hey, it can’t hurt!).
The Role of Preparation
Preparation is the important stage in installing fences and applying stains to ensure longevity and effectiveness. Proper preparation ensures the correct adhesion of stain to prevent peeling, uneven coverage, or unintentional moisture damage to the wood. When one cleans and prepares their fence properly, it ensures a smooth and enduring finish over time. Here are a few key factors to consider during the preparation process:
- Follow the Label: Always check the directions for your specific stain can. Every brand and type of stain comes with variations in their drying time and recommendation, and hence it is always better to follow the manufacturer’s instructions for optimum use.
- Oil-Based and Water-Based: By nature, oil-based stains take longer to dry compared to their water-based counterparts. Thus plan your schedule accordingly because an oil-based stain would need extra time before it can withstand drenching by the rain or moisture.
- Weather Conditions: Drying time is significantly affected by temperature and humidity. Ideally, you want a warm day, but not too hot, with low humidity. Cold or damp conditions slow drying, while too hot or dry causes the stain to dry too fast and unevenly.
- “Dry to Touch” vs. “Fully Cured”: A fence may feel dry to the touch after a few hours, but this does not make it fully cured. The stain takes a little while longer to cure completely and bond with the wood to prevent moisture and wear. Be patient, as this is what gets a long-lasting protective finish in the end.
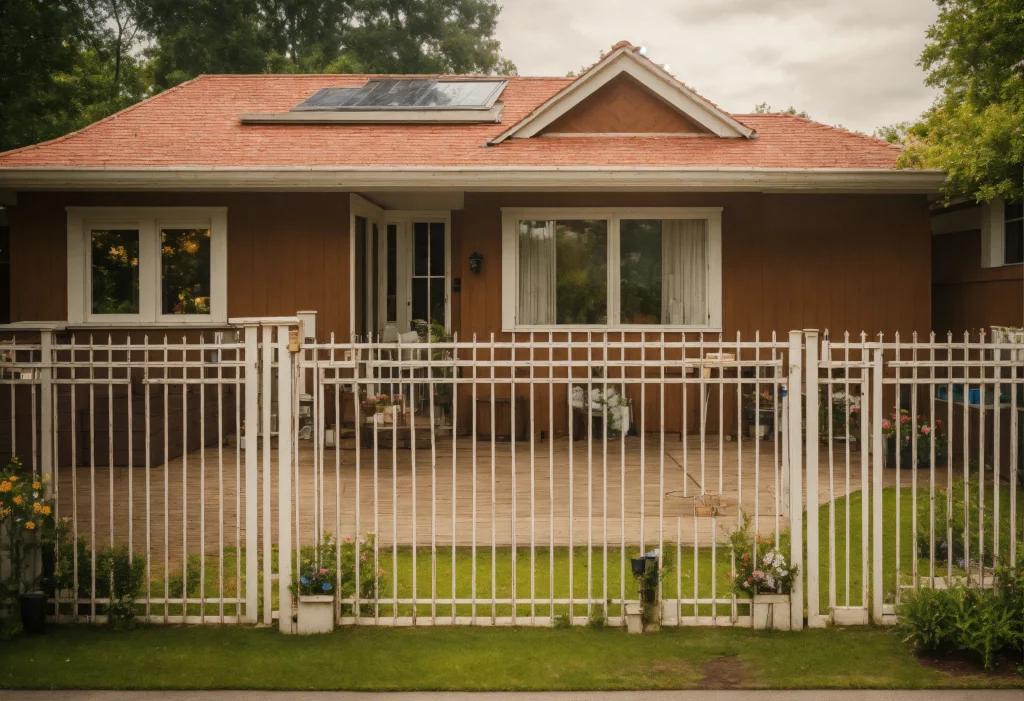
In Summary: Stain Smart, Stay Dry
So you stain your fence to enhance its quality and durability; however, the time when that stain will dry becomes quite critical. Hence, it is advisable to let that stain dry and sit for an ample period, preferably about 24 hours at least, after which the fence may be exposed to rain. With careful preparations, a little patience, and checking the weather forecast, one can ensure that the stain cures well, and the fence continues to be protected.
At fairfield fence company we know it sometimes feels like you’re balancing on a tightrope when scheduling your staining project. That’s why we offer expert advice and professional services for your fence to prepare it for a spectacular look and a life outside. Whether you’re after tips or hands-on help, we’ve got your back – and your fence.
How to Calculate Labor Costs for Fencing
When installing a fence it is important to note that putting up fences will require quite a bit of investment whether for purposes of privacy, security, or just aesthetics. Among the most important things to note when considering fencing as part of your project is labor costs. Labor costs may differ depending on some factors. Labor cost calculation for fencing will help calculate the amount needed for the entire project, thus enabling planning to avoid nasty surprises during installation. In this guide, we’ll discuss how to calculate labor costs for fencing and the most significant factors that determine them.
Labor costs account for the highest portion of any given fencing project. It doesn’t only refer to the time spent physically installing the fences, but it also includes the expertise of the workers as they ensure the whole installation comes out perfectly. Knowing how to calculate these costs can help you decide whether to attempt the installation independently or hire someone else to do it. A well-calculated labor cost can also help ensure that you are receiving fair pricing, making your fencing investment economically sound as well as long-lasting.

Step-by-Step Guide to Calculating Labor Costs for Fencing
1. Measure the Fence Perimeter
The calculation of fence labor costs begins with determining the amount of fencing materials needed. This starts with taking accurate measurements of the area to be enclosed. Depending on how complex the job might be, this includes measuring several straight lines and/or measuring curves, corners, or different elevation heights.
Once you’ve completed this, you will know the total length of the fence you require, which is going to be essential in estimating total labor costs.
2. Choose the Type of Fence
The kind of fence you want, either chain link, wood, vinyl, or one of the specialty types, will play a major role in the labor expenses. Some types of fences take a longer build-up time and require a skilled hand than others. Vinyl fences, for instance, will take more time and effort to install than more complex wrought iron or wood fence types with more detail, like post setting, railing installation, and more.
Understanding the complexity of your fence profile will allow you to calculate the labor cost perhaps. Each type possesses its standard labor rates, often determined by the time it takes to install a section of fence or how labor-intensive the material is.
3. Research Local Labor Rates
There is much difference in labor costs for installation of fencing as per the region. For example, fence installers would charge more in a city than in a rural area; they offer higher prices for maintaining their standard of living. To ensure that one does not pay more, it is great to know the average hourly rate of fencing installation in your area or locality. You might get estimates from various internet sites, local contractor web pages, or even industry publications.
You can ask for quotes from several contractors to compare the cost and services offered. If you are receiving services from a fencing company, they may offer different packages that would include both labor and materials, simplifying the account calculation.
4. Estimate Installation Time per Linear Foot
Once you have identified your local labor rates and your type of fencing, the next step is to estimate how long it will take to put up the fence. A skilled worker can put down a certain number of feet in an hour, and that is usually determined by the difficulty of just putting up the fence.
A skilled worker, for example, might be able to install a chain-link fence for about 10 feet every hour. For fences like wood or wrought iron that require more labor to be done, this amount may decrease because of the time needed for post-setting as well as other adjustments.
5. Calculate Labor Cost per Linear Foot
Now that the hourly rate and the estimated installation time are in place, you can proceed to calculate the labor cost as it would be charged per linear foot. To accomplish this, you will need to divide the hourly labor rate by the number of linear feet that a skilled worker can install in one hour. For instance, in a case where the local labor rate is $25 per hour and a worker can install 10 linear feet of fence per hour, the labor cost per linear foot would be $2.50.
6. Factor in Additional Considerations
Several additional factors can influence your labor costs, including:
- Site Preparation: If the area you are going to put up a fence needs to be cleared-debris, leveling the ground, or digging holes for the posts you will need to spend time and labor costs on these activities. Some contractors might charge you separately from the cost of installing the fence for site preparation, so it is always good to confirm it with the contractor before the project begins.
- Installation of Gates: The complexity involved in installing a gate greatly supersedes that of any normal section of fence. The size of a deployed gate would mean the type of hardware suitable for it and the extra time needed for setting the posts could considerably affect the total labor cost involved in the overall work. All such aspects should be considered by you while calculating the total cost involved.
- Obstacles: If the installation site has obstructions with trees, rocks, or uneven ground, it will require more time to work around them thus causing high labor costs. Further, installing a fence on a slope is likely to need more planning and work so that additionally adds time and costs.
Example Calculation
Just to give an example, you should go out and install a 100-foot-long chain-link fence. You find that your area’s average labor rate for fence installation is about $25 per hour; just by what you saw in the research, a skilled worker can put 10 feet of chain-link fence every hour.
Here’s how the calculation would work:
- Labor Cost per Linear Foot: $25 per hour ÷ 10 feet per hour = $2.50 per linear foot.
- Total Labor Cost: 100 feet x $2.50 = $250 for labor.
This is a basic example, and additional factors such as site preparation or gate installation could increase the cost.
Additional Tips to Keep in Mind
When getting your installing a fence, it’s best to have several contractors approach you with their quotes before you settle in. Doing so makes it certain that you have not been watered down and are receiving a fair fee for your fence. Some may offer you packages, having included in them not just fees for labor but also that for materials. If you can afford the initial cost, this eliminates much hassle later on as you save more in the long run.

You could possibly do it yourself to save money on labor, but keep in consideration how much time it would take and the potential for mistakes. If this task looks too complicated, skip the hassle and find someone who can do it well. Always inquire about warranties before hiring contractors. Many provide a warranty on the workings, thus giving you relief if something misfires after installation.
In essence, labor costs for fencing refer to a precise evaluation of important factors. Such aspects include types of fencing materials, complexities of installations, and labor rates in a specific region. Adhering to the steps offered in this guide should enable anyone to precisely establish labor costs for fencing and save one from unexpected events. The cost may either be for a contractor or a DIY project; knowing the costs is important for decision-making.
If you are interested in a professional service for your fencing project, then try out fairfield fence company The experts will guide you through every single step and assure you of having selected the best-fitted fence, not only in terms of the needs it serves but also regarding budgeting. Years of experience and a reputation for quality mean that any installation will be straightforward, efficient, and economical. So, start your project here today!
How Wide Should a Fence Gate Be?
A fence gate is so much more than the entrance to a property; it can add value to the beauty and security of the property. Whether the fence is meant for privacy, to keep animals in, or simply for aesthetic purposes, the size of the entryway determines a great part of how well the fence works. A gate of inappropriate size will obstruct the flow of traffic, affect the security of the property, or leave the gate looking unbalanced. For this reason, selecting the right width of your fence gate is crucial according to the needs you require and the lifestyle you lead.

The Importance of Choosing the Right Fence Gate Size
Choosing the most ideal width for your fence gate is not easy. A fence gate serves all kinds of purposes: access to your space, security for your home, and the opportunity to reflect the design of the whole home. The width of your fence gate is certainly no generic decision. The right width ensures smooth operation of the gate without obstructing traffic flow or seeming out of proportion with your property.
Multiple considerations will also help determine what the right size is for your fence gate. You might consider the type of access required and the frequency it will be used, as well as the size of vehicles or machinery that will be going through it. Good reasons sufficient enough to convince you include how easy or complicated it is to open up that gate, maintain it, and manage it financially. Let us take a much closer look at the various sizes of gates and how you can make the right choice for your property.
Standard Fence Gate Sizes
As far as those gates are concerned-fence gates, there are lots of standard sizes. Narrow pedestrian gates for instance and wide gates to accommodate vehicles. The standard widths of the gates depend upon the function for which they are used. A small gate-pedestrian in size would be used for humans, bigger gates would be used for equipment or vehicle access, however.
- Pedestrian Gates: The smallest and most basic dimension of the gate is for pedestrian access. Generally, a gate width of 3 feet is adequate for comfortable passage of persons. It is the perfect choice for front yard gates or garden gates, where usage is primarily foot traffic. A 3-foot-wide gate is easy enough to operate by smaller children or by the elderly without requiring too much space.
- Small Machinery Gates: If you need to accommodate small machinery such as push lawnmowers, a gate width of 3.5 to 4 feet is usually a better fit. This size allows easy access for pushing mowers, wheelbarrows, or garden carts while still maintaining a relatively small footprint.
- Larger Equipment or Riding Mowers: For riding mowers or other larger equipment, a gate size of 5 to 6 feet is recommended. This ensures that you have enough room to maneuver bulky items through without damaging the gate or the surrounding fence.
- Vehicle Access Gates: A gate should ideally be several folds wider in case it is to serve vehicles like cars, trucks, or SUVs. Typically, a 10-foot-wide gate does very well for ordinary vehicles, but for larger units like trucks, RVs, or trailers, we might require an opening of at least 12 feet. It’s essential to consider how often vehicles need to access the space and how large the vehicles are to determine whether a single or double gate will be necessary.
Factors to Consider When Deciding on Gate Size
Choosing the best width for a fence gate is a decision based on practicality, convenience, and the requirements it is supposed to satisfy. The width of the gate would depend on how frequently it is to be used, the type of equipment or vehicle being passed through, and the space available to open and close the gate. Generally, for pedestrian gates, a 3-foot width works fine, but for larger equipment or vehicles, a much wider gate would be needed. More frequent use may, however, require consideration of how easy it is to operate since such a gate would need to meet the ideal to function as it should.
Such a design, besides being aesthetically pleasing, should also match the entire house design without leaving it looking overly broad or narrow compared to the fence. Space around the gate is an important aspect. The gate must also have a minimum amount of space to open freely. If space is too tight, the sliding gate would probably be a better alternative. Last but not least, by budget, since larger gates invariably find themselves costing relatively more, if only because the materials increased in such cases, quite an enormous amount of money goes into installation and maintenance. A smaller gate is likely to reduce future costs if a wider gate is not needed regularly.
Single vs. Double Gates: Which Is Right for You?
When choosing the best width, you can choose from a single or double gate. Both have their advantages and disadvantages. The choice depends on the requirements of an individual.
- Single Gates: Single gates are more common for pedestrian access and smaller vehicles. A single gate, typically measuring around 3 to 4 feet wide, is easy to open and close and doesn’t require as much hardware. However, for larger vehicles or wide openings, a single gate may not provide enough clearance.
- Double gates: These are the best solutions for bigger openings like vehicular access. A pair of equally sized gates swings open outward. Usually, Double gates would be used for wide driveways and commercial properties where big trucks or similar equipment pass through. Double gates require a little more space to open the gates, but they can be custom-made for particular requirements.
How We Can Help You Choose the Perfect Fence Gate Size
Choosing the right widths for your fence gate is not an easy task as understanding the different aspects through which it may become functional, secure, and beautified is most capable. Whether you want a little gate for pedestrian entrance or a large one for vehicles and heavy machinery, many options can be included to customize the selection. Size ensures the gate fulfills its purpose and also beautifies the property accessible through it.
If you are confused about what is the exact size of the gate that will be best for your property, then don’t hesitate to talk to a professional for advice. fairfield fence company is here to serve you with tailor-made possibilities as per the requirements of your property. We can help you with the choosing of an ideal gateway size for your property so that it looks fully integrated into your property, is complementary to your fencing, and fulfills all your access requirements. Then you have come to the right place concerning choosing and installing a very functional and aesthetically pleasing outcome.
Contact us today for assistance with selecting and installing the perfect fence gate to fit your property’s needs!
What Is a Chain Link Fence Made Of?
Chain fences are very practical and straightforward in terms of use for residential and commercial properties. They are viewed as one of the most durable, cheap, and easy-to-install fences in almost every part of a yard, playground, sports courts, and animal enclosures. These fences are easily functional, and understanding the materials and methods used to construct them further highlights why they are such a popular preference for fencing. This article further expounds the composition, fabrication, and components of a chain-link fence, and serves as a guide to all those who wish to know more about this typical fencing solution.
The Materials Used in Chain Link Fences
Chain-link fences are designed to be made of simple but tough, anticorrosive materials engineered to withstand atmospheric conditions, such as moisture, sunlight, or wear. Here, then, are the main components.
- Galvanized Steel Wire: Most chain link fences consist of galvanized steel wires. The wires are made of steel to give them the non-manipulative strength to resist taking such shape of deformation. However, the wires are coated to protect them against rust and corrosion because of softening processes. So the sophistication of the process of melting and rapidly cooling the descaling sets up conditions for their use as outdoor materials.
- LLDPE-Coated Steel Wire: Another option for chain-link fencing is linear low-density polyethylene (LLDPE) coating. This coating provides additional protection against environmental elements while improving the durability of the fencing. In addition to this, it also allows the steel wire to be flexible and reduces the chances of cracking under stress.
- Vinyl Coating: Chain link wires are most often coated in vinyl for a more refined appearance and longer life. Available in different colors, vinyl adds an attractive touch to the fence and serves as an additional moisture and UV protective layer. It is a popular choice for residential uses where one would like to use an aesthetically pleasing option that blends with landscaping and architectural styles.
How Are Chain Link Fences Made?
The process of creating a chain link fence involves weaving wires into a distinctive diamond-shaped mesh. Here’s an overview of the manufacturing process:
- Wire Preparation: The process starts with large spools of steel or aluminum wire, which are delivered on the factory floor. In the factory straightened using specialized machines, these wires are normally set up with other treatments or processes. For wire coating, the wires are dipped into molten zinc or heated plastic, cooled to set the coat.
- Weaving the Mesh: Wire, either coated or bare, is fed to a weaving machine, where it is woven into the specified zigzag pattern which interweaves adjacent wires and produces the distinctive diamond mesh. This provides strength and flexibility, making the fence durable while being easy to erect.
- Sheet Formation and Cutting: Once the mesh is woven, it is assembled into large sheets of fencing material. These sheets are then cut into desired sizes, ready for installation.
Supporting Structures: Fence Posts and Their Materials
Chain link fences rely on fence posts to provide structure and stability. These posts come in various shapes and materials, each serving a specific purpose.
1. Post Types
- Straining Posts: Located at the ends, corners, and points where the fence changes direction, these posts serve as the primary supports for the fence. They are to be firmly secured in the ground, spaced rightly and tolerably, so that there is tension across the fence.
- Intermediate Posts: These posts supplement straining posts to ensure stability; they are spaced at specific distances between straining posts to allow the fence to remain upright and stable.
2. Post Materials
- Angle iron posts: These are economical, made from steel, and easily erected. They feature pre-drilled holes for attaching fence mesh but require maintenance to avoid rust.
- Timber posts are constructed from wood they present beauty but normally need supplementing with chain link fencing in residences. They also require further treatment for resistance to weather.
- Concrete posts: These are the costliest though they are very heavy and require a lot of effort to set up. They, however, provide excellent stability and longevity making them the most durable option.
Why Are Chain Link Fences So Popular?
In addition to their versatile nature-for a moderately-priced product, they offer a plethora of high-pro and extensive applications. Such application may vary from securing residential yards to enclaving industrial properties. The design is open so there is always visibility, which is an advantage for security purposes, but there can be added vinyl coatings or privacy slats for purely aesthetic and functional requirements.
Uses of Chain Link Fences
Chain link fences are incredibly versatile, serving a variety of purposes:
- Residential Utilization: Chain Link fencing can be ideal for defining aspects of property boundaries, detaining pet safety, or child-play areas. Often this kind of fencing is economical and easily installed, and so may be utilized by low-cost families.
- Commercial and Industrial Applications: Firms use chain link fencing for perimeter security, asset protection, and restriction of access to certain areas. It is ideal for high ingress/egress areas due to its durability and very little maintenance.
- Recreational and Public Spaces: Chain link fences are installed in parks, sports courts, and school playgrounds. They are designed in such a way that visibility is ensured while providing safety and protection.
- Agricultural Use: Farmers and ranchers use chain-link fencing to contain their livestock as well as for crop protection. The robustness of the material and its flexibility makes it suitable for staying outdoors.
Maintenance and Longevity
Maintenance is mandatory to guarantee continued service from a chain link fence:
- Check-Up: Significance of regular inspection for any signs of wear such as rust, loose wires, or damaged posts.
- Cleaning: A soap and water wash removes the dirt, debris, and mildew all from outside so that the fence remains in optimum condition.
- Repairs: Prompt repair of the damage can prevent the possibility of further damage.
- Re-Coating: Reapplying coat-as-required protective dirtiness barriers provides strength to the site while at the more corrosion resistant.
Once given proper maintenance, a chain link fence could go on for decades, so it becomes a really cheap investment from which property owners cannot shy away.
To sum up, chain-link fences suit many applications as they are durable, inexpensive, and versatile. This makes chain-link fences good for use in residential settings as well as in securing a sports field or for guarding a commercial property. Chain-link fences will certainly serve you for a long time due to the kind of materials and construction methods used. If you are thinking of installing a chain link fence or are trying to find advice on what materials to choose to work with, our team is here to assist you. With years of experience and expertise in fairfield fence company give us lots of experience in commercial fencing services to provide high-quality but customized solutions.
Contact us today to point out what you want in your property to make it more beautiful with a reliable, really strong chain-link fence customized with personalized specifications.
How to Paint a Fence?
Fences are not just things that make boundaries; they also sprinkle some spice in your house with privacy and security for your property. A good fence, painted and maintained well can enhance the way your outdoor area looks. It can be welcoming and make itself very pleasing to the eye. Painting a fence is not only about its visual aspects. It also keeps the wood from rotting as well as weather damage. Restoring an old fence or painting a new paint in it would mean taking time and following a very detailed and systematic approach so that it causes a professional-looking, long-lasting result.
This guide walks you through everything you need to know about painting a fence, from preparation to the final coat. Let’s dive in!
Why Paint Your Fence?
To paint your fence is not just for a fantastic aesthetic but is certainly a wise investment directly related to its longevity and appearance. Among the great advantages of painting a fence is that it brings durability. The paint is a protection against moisture which leads to swelling and, ultimately, decay in the wooden structures. Not only does the paint act as a barrier against moisture, but it also protects the wooden fence from the sun’s rays; UV rays lead to fading and cracking with the passage of time. It also plays a major part as a barricade against wood-destroying insects such as termites, protecting the fence from internal damage.
An attractive hand-painted fence enhances the visual aspect of your overall outdoor space. Choosing colors that go with the home and garden will make the environment complementary and pleasing to the eye, maximizing curb appeal. Beyond aesthetics, painting has an important function in damage prevention. By sealing the wood surface, it strengthens the defenses against cracking, warping, and decay as exposed to the elements, thereby prolonging the life of the fence.
Lastly, a painted fence makes maintenance simple. Because the smooth, sealed surface prevents dirt and grime, it’s easy to clean whenever it gets freshened up throughout the year. Paint features those qualities that make it worth painting a fence: beauty and long-lasting protection. Thus, making paint worthwhile for homeowners, who want to use their fences not only for performing functions but also for style.
Step 1: Prepare the Area
Before starting the painting, it is necessary to prepare the area around so that the place does not get damaged and the operation is carried out smoothly.
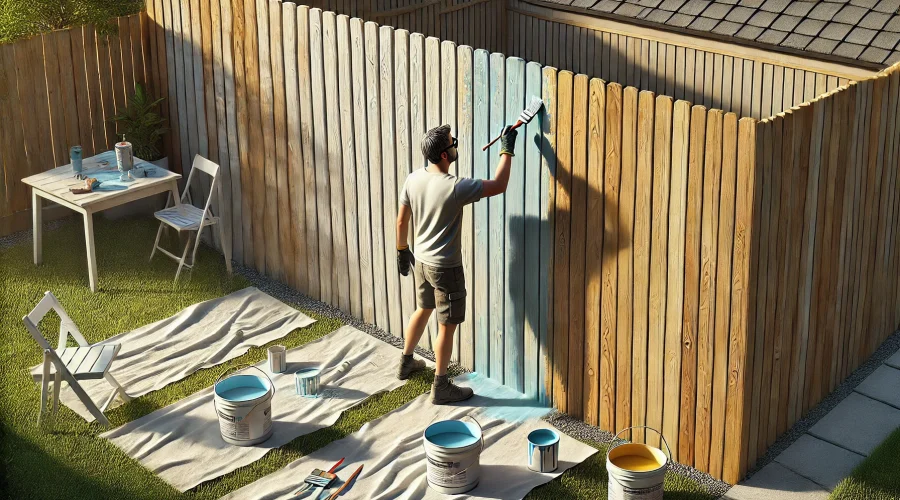
- Space will be Cleared: Any plant, garden furniture, and decorations near the fence will be cleared so that the paint place can be reached easily without accidentally splattering paint anywhere.
- Protect Nearby Surfaces: Bring up some canvas or plastic sheets and drop cloth to cover the ground and other nearby items.
Make sure you take those measures for setting up a clean working area and minimizing cleanup chores afterward.
Step 2: Inspect and Repair the Fence
Inspect your fence thoroughly before picking up a paintbrush.
- Damage Check: Look for all loose boards, cracks, rots, and protruding nails.
- Repairs: Tighten screws, replace damaged panels, and fix any structural issues.
- Treat Rot: In case you see a sign of rotting, treat it with a wood preservative to avoid any further deterioration.
Early attendance to these issues gives an easy and smooth paint job and an excellent finish.
Step 3: Clean the Fence
A clean surface is critical for proper paint adhesion. Here’s how to do it:
- Pressure Washing: The use of pressure washers helps to eliminate grime and dirt, as well as old paint. However, extreme care must be taken while pressurizing so that wood does not get damaged.
- Scrubbing: Without the pressure wash, if one would rather scrub clean a fence, go for a soap and water solution along with a stiff-bristle brush. The scrubbing finishes with rinsing to remove all residues completely.
- Drying: Next, the complete fence needs to be left to dry entirely before proceeding with the next step, this normally takes about 24-48 hours depending on conditions outside.
Step 4: Sand the Surface
It creates a surface that smooths paint adhesion and effectively soothes the final coating.
- Light Sanding: Use medium-grit sandpaper to sand down the whole fence while concentrating on all the rough or uneven areas.
- Remove Dust: After the sanding, the fence should be wiped down with a damp cloth or blown clean with a leaf blower.
Step 5: Apply Primer (Optional)
Primer acts as a base coat, improving paint adhesion and durability.
- Apply Primer: Apply primer to a new fence, for exposed bare wood surfaces, or when changing to a paint color significantly different from the existing one.
- Selecting a Primer: Use a primer that is designed specifically for exterior wood surfaces.
- Application: Brush or roller apply a thin even coat of primer. Allow it to dry completely prior to painting. Use special primers made for that purpose when it comes to wood for exterior purposes.
Step 6: Choose the Right Paint
Selecting the right type of paint is crucial for a long-lasting finish.
- Outdoor Specific Paint: The paint has been in dedicated use outside since it is made according to the speculations for being weather-resistant.
- Color Coordination and Finish: Choose the best color most suited for your practical home and a preferred finish such as matte, satin, or glossy.
- Water-Based or Oil: Water-based paints may be environment-safe and dry fast but do not come up even close to oil-based paints for durability.
Step 7: Painting the Fence
Now that the fence has been painted and the selection of color is done, the whole painting process will commence. Paint application is heavily influenced by choosing the right painting tools. A brush applies best to the detailed areas, corners, and edges, where it can suit closed areas. Little flat surface areas attached to bigger areas can use a roller, while any painting work requiring a smooth, even effect can be done best by a paint sprayer, although the technique can take some practice to keep from over-spraying.
Start with the application of the first coat from the top of the fence to prevent any possible drips and work downwards. Apply the paint in a thin, even layer, covering all areas uniformly. After applying the first coat, allow it to dry properly, according to the manufacturer’s suggested drying time. If necessary, apply a second coat to create an even, protective finish that gives the fence extra durability and attractiveness.
Step 8: Important Considerations
To achieve the best results, keep the following in mind:
- Weather Conditions: Select a pleasant, dry day for doing the painting outside. Avoid being painted with direct sunshine, high humidity, or windy conditions.
- Protective Gear: Wear gloves and goggles together with some old clothes to paint, safeguarding from splashes.
- Ventilation: When employing a sprayer, have ventilation to avoid inhaling fumes.
Step 9: Maintenance Tips
It is important to maintain your painted fence regularly to keep it fresh and sturdy over time. Start with regular inspections to look for damaged, chipped paint, cracks, holes, and so on. If you tend to these issues right away, they won’t worsen and make your fence last for a longer period. And of course, you will need to wash it from time to time, washing the fence with water and mild soap helps remove dirt, mildew, and grime from the environment that collects on the pretty fence and dulls its appearance.
Moreover, repainting once every few years, or as required, keeps the protective barrier intact and wards wood away from moisture, UV rays, and other detrimental elements. This is the way to keep your painted fence looking good for many years to come.
A fence painting project can be a novel DIY experience about enhancing the curb appeal of your property and the protection it affords against the elements. Follow the steps in this guide, and you can get a finish that looks professional and will be there for many years. Success depends on proper preparation, the right tools, and attention to detail. Contact our expert team for maintenance or improvement on your fence. We offer top fairfield fence company including specialized solutions to meet your individual needs. Call us today to make sure your fence is as nice as required mixed with the fact that it is indeed a fence built to last.
Happy painting!
How to Keep Dogs from Digging Under Fences
Dogs are the most curious and energetic pets, with digging as one of the instincts that they frequently use. It can be harmless in certain areas while in some areas, digging becomes a problem when the dog digs under the fence and escapes to some open fields, where potentially dangerous situations can arise for the dog. Solve the issue by understanding the real reasons or causes for digging in dogs and how to apply such appropriate containment measures into your yard depending on your dog to keep it safe.
Why Do Dogs Dig Under Fences?
Digging is instinctive, and dogs dig under fences for these reasons:
- Bored: The bored dog might well dig, banging with its paws on the ground.
- Prey Drive: The smell of or vision of something tantalizing beyond the fence, say, a squirrel or a bird, may make the dog attempt to dig out.
- Escape: Every dog has that inborn tendency to want to roam beyond his threshold.
- Cooling Down: Digging into the cool soil for relief on hot days.
- Separation Anxiety: Dogs will dig instead when they are left behind alone.
Effective Barriers to Prevent Digging
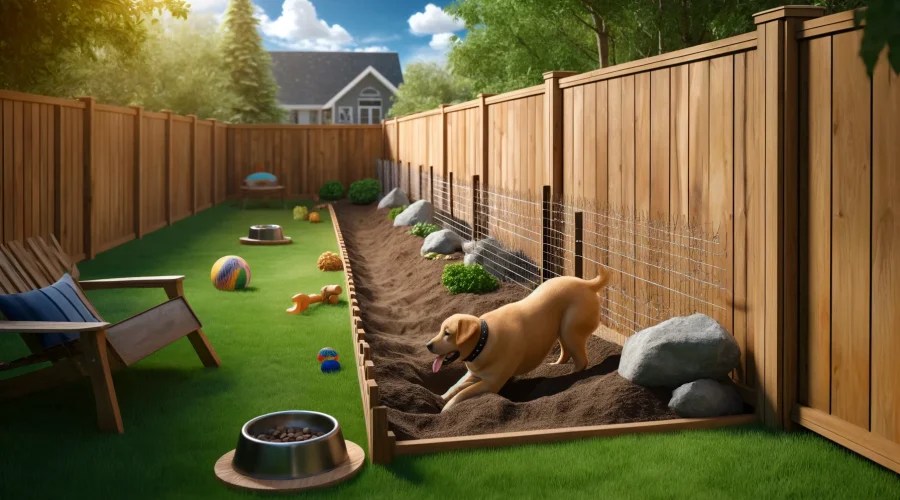
Understanding why your dog digs is important in finding a long-term solution. After knowing what triggers the digging, creating physical barriers can help keep your dog from digging under the fence. One of the popular methods is installing a buried barrier such as chicken wire, hardware cloth, or mesh. Dig a trench about one to two feet deep and stretch the material out in an “L”-shape to create a tough, uncomfortable surface that discourages your dog from digging down or around the fence.
Alternatively, landscaping rocks can be a functional and aesthetic solution. Heavy stones placed along the fence line, with landscaping fabric underneath, will stop your dog from digging and beautify the yard. Another area to pay attention to is the gaps under the gates. Securing these areas with a snug wooden or metal post eliminates access and removes the visual temptation for your dog to dig. By doing this, you will be able to protect your fence and also keep your dog safe.
Deterring Dogs from Digging
Instinct and a natural sense of curiosity leads dogs to dig up the soil, especially around fences. If your dog digs a hole, a barrier may help, but one might want to consider how to change the dog’s behavior regarding digging. Understanding the animal’s motivation combined with intelligent deterrents can lead your dog away from digging and toward more positive activities. Whether in escape, boredom, or a natural hunting instinct, however, the correct methods can keep these behaviors in check while helping ensure the dog enjoys a safe, happy place in the yard.
- Dog Training: Supervised training is a way to teach a dog that digging is undesirable. Catching a dog in the act can cause a distractive “no,” clap, or toss of a toy to get its attention. Reinforcement of positive behaviors can reduce the urge to dig.
- Block Visual Triggers: Dogs usually dig because they see something odd from somewhere outside. Cover the through fence using outdoor fabric, bamboo screens, or use simple panels to block their view.
- Use Deterrents: Capsicum spray or homemade pepper mixtures could deter dogs from digging along fence lines. Spray the deterrent at the base of the fence and areas already dug by its dog. These sprays are safe and annoying, and keep dogs away from an area; reapply them every two weeks for maximum effect.
Redirecting Digging Instincts
All dogs have an instinct to dig, but if a dog becomes destructive, you can train the dog to dig appropriately in a specially designated digging space. You can set up a dig pit in your yard, which will allow your dog to dig in a controlled way in a safe place. Clear a small area out, lay landscaping fabric, and fill it with sand or soft earth. Bury some toys or treats in the pit to make it more interesting and encourage your dog to use them.
Eventually, with some positive reinforcement, they will begin to associate digging with this specific area. Also, exercising your dog very well would definitely prevent him from digging where he or she should not be digging. Activities such as walks, games, interactive, and puzzles would really allow your pets to exercise while keeping their minds stimulated, burning the extra energy, so keeping your pet happy.
How to Prevent Digging Long-Term
In order to resolve the issue of digging, patience, and consistency are needed. Combining diverse approaches is usually the most successful strategy.
- Supervision: Stay by your dog’s side when outdoors to prevent bad habits.
- Reinforcement Training: Positive reinforcement and redirection will also help in training your dog to unlearn bad behaviors as time goes by.
- Altered Environment: Create a safe and stimulating yard with barriers, repellents, and enrichment activities.
How We Can Help
At Best Fence Installation Company in NJ, we understand the importance of keeping your pets safe while ensuring the aesthetic and functional integrity of your yard. We specialize in fairfield fence company offering durable, pet-friendly solutions tailored to your needs. Whether you need secure fencing, barriers to prevent digging or expert advice, our team is here to help.
Invest in a safe, secure, and pet-friendly yard with our professional fencing solutions. Contact us today to learn more about our customizable options for keeping your beloved pets happy and secure!
- ‹ Previous
- 1
- 2
- 3
- 4
- Next ›
